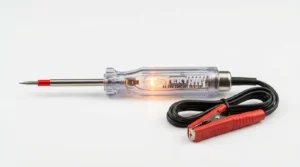
Use a test light by grounding its clip, probing circuits, and watching the lamp for power or faults.
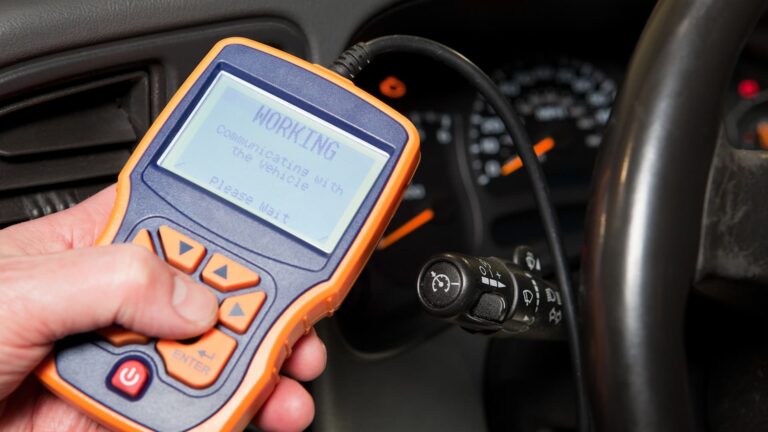
I’ve spent years under hoods and in repair bays teaching and using tools like an automotive test light. This guide explains how to use automotive test light safely and effectively, step by step. You’ll get clear definitions, tools needed, practical tests, real mistakes to avoid, and when to switch to a multimeter. Read on to learn simple, reliable ways to find power, ground, and shorts in automotive wiring.
What is an automotive test light?
An automotive test light is a simple diagnostic tool that shows electrical presence by lighting a bulb or LED. It has a probe at one end and a clip or alligator clamp at the other. The probe touches a circuit point. The clip connects to a ground or battery. When the circuit has voltage, the light glows.
The tool is used for basic checks: power, ground, continuity, and fuse testing. It is not as precise as a multimeter, but it is fast and rugged. Knowing how to use automotive test light helps you save time on basic electrical troubleshooting.

When to use a test light
Use a test light for quick checks. It helps when you need to know if a circuit has power or a good ground. Use it for:
- Testing fuses and connectors for power.
- Checking whether a switch feeds voltage.
- Finding a good chassis ground.
- Verifying power at bulbs and relays.
Avoid using a test light on sensitive electronics, low-voltage sensors, or circuits where current draw matters. For those, a multimeter or oscilloscope is better. Learn when and how to use automotive test light so you don’t risk damage.

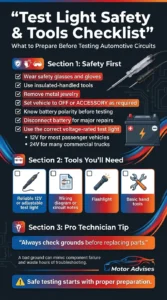
Tools and safety before you begin
Safety first. Follow these basic rules before using a test light:
- Wear safety glasses and gloves to protect eyes and hands.
- Use insulated handles and keep metal jewelry off.
- Set the vehicle to off or accessory per the test need.
- Know battery polarity and disconnect when doing major repairs.
- Use a test light rated for the vehicle voltage (12V for most cars, 24V for trucks).
Also gather:
- A reliable test light (12V or adjustable).
- A wiring diagram or simple notes about the circuit.
- A flashlight and basic hand tools.
These steps reduce risk and make tests repeatable. When I first started, I learned to double-check grounds before assuming parts were bad. That saved hours of troubleshooting.
Step-by-step: How to use automotive test light
Follow this clear process when testing power or ground:
- Inspect the test light
- Check the probe tip and clip for corrosion.
- Confirm the lamp lights when clip is on battery negative and probe touches battery positive.
- Connect the ground clip
- Attach the clip to a known good ground or battery negative terminal.
- If testing switched power, clip to battery negative and have someone operate the switch.
- Probe for power
- Touch the probe to the terminal or connector pin you want to test.
- If the light glows, power is present. If not, no power or a bad ground.
- Test for ground
- Clip the test light to battery positive and probe the suspected ground.
- Light means good ground. No light means open ground or corrosion.
- Test fuses and circuits
- Probe both sides of a fuse with the clip on ground. One side glowing and the other not means the fuse or feed is bad.
- For connectors, probe the back of a connector with the plug in place if possible to avoid breaks.
- Check relays and switches
- Probe relay sockets to see if coil and feed terminals get power.
- For switches, check input and output terminals while operating the switch.
- Finish safely
- Disconnect clip, stow tool, and record results for repair steps.
This step-by-step flow shows exactly how to use automotive test light for basic tasks. It keeps tests simple and reliable.

Common tests and real examples
Here are common checks I do weekly and how to perform them:
- Fuse test
- Clip to ground, probe both sides of fuse. If one side lights and the other doesn’t, the fuse is blown or the feed is open.
- I once replaced a hidden blown fuse in minutes using this test instead of chasing wiring.
- Bulb power test
- Clip to negative battery and probe socket contacts. A glowing light shows feed, but a burned bulb or poor ground may still be the issue.
- Turn signal fault
- With the flasher on, probe socket pins to see if the feed pulses. A steady light means a missing bulb or wrong load.
- Starter relay feed
- Probe relay socket while turning the key. If coil power is present but starter doesn’t crank, the starter or its wiring may be faulty.
These examples show why knowing how to use automotive test light speeds diagnosis and lowers repair cost. I often find faults that look complex but test light reveals in minutes.

Source: amazon.ae
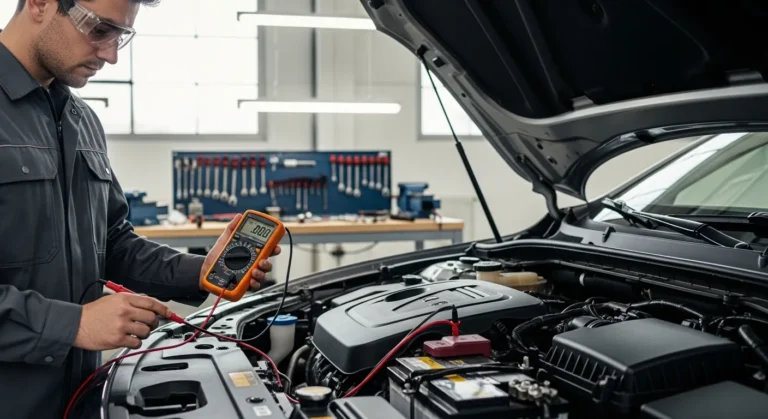
Limitations and when to use a multimeter
A test light has limits. It shows presence of voltage but not the exact value or polarity in detail. Use a multimeter when:
- You need precise voltage measurements.
- Testing low-voltage sensors or CAN-related circuits.
- Measuring current draw or resistance accurately.
- Working on modern vehicles with sensitive electronics.
A test light can give false results if the circuit has very low current or protective electronics. When in doubt, verify with a multimeter or scan tool.
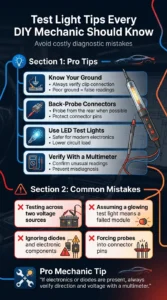
Personal tips, mistakes to avoid, and best practices
From my years of hands-on work, here are tips you’ll use right away:
- Always know where your clip is connected. A floating clip gives false readings.
- Probe from the back of connectors when possible. That avoids bending or breaking pins.
- Don’t use a test light across two different voltage sources. This can short and damage electronics.
- Use a low-current LED test light on modern cars to avoid stressing circuits.
- If a circuit has diodes or electronics, the test light may light through them. Confirm direction with a meter.
One time I assumed a bad module after a test-light glow, but the issue was a diode passing minimal current. A multimeter stopped me from replacing an expensive part. Learn these small lessons early.
Troubleshooting checklist
Use this quick checklist when a test light result is unclear:
- Re-check the ground clip connection.
- Test the tool on the battery to confirm it works.
- Try probing the opposite side of the component or connector.
- Use a multimeter if readings are inconsistent.
- Consult wiring diagrams or service manuals for circuit paths and fuses.
This checklist saves time and prevents wrong repairs. It’s a simple set of steps I follow on every electrical job.

Frequently Asked Questions of how to use automotive test light
How do I test a fuse with a test light?
Clip to ground and probe both sides of the fuse. One side glowing and the other not indicates a blown fuse or open feed.
Can I use a test light on modern cars?
Yes for basic checks, but use a low-current LED tester and avoid probing sensitive modules; confirm with a multimeter when in doubt.
What does it mean if the test light glows dimly?
A dim glow can mean low voltage, poor ground, or resistance in the circuit; verify with a meter and check connections.
Where should I clip the test light ground?
Clip to a clean chassis ground or battery negative terminal for best results; avoid painted or rusty spots.
Will a test light damage electronics?
A heavy current test light can stress modern electronics; use a low-current LED tester on sensitive systems to reduce risk.
Conclusion
Mastering how to use automotive test light gives you fast, reliable checks for power, ground, and basic faults. Start with safety, confirm your tool, and follow the step-by-step tests to save time and avoid costly mistakes. Try these methods on a simple circuit today, then apply them to tougher jobs as your confidence grows. If this guide helped, leave a comment, subscribe for more tips, or share a troubleshooting story from your own garage.