Attach the kit, bleed each wheel in order, keep master cylinder topped.
If you want a firm brake pedal and safer stops, you can do it at home. I’ll show you how to use brake bleeder kit the right way, with clear steps, pro tips, and real-world fixes. I’ve bled brakes on daily drivers, track cars, and bikes. You’ll learn what to buy, what to avoid, and how to get pro results without stress.
What a Brake Bleeder Kit Does and Why It Matters
A brake bleeder kit pulls or pushes air and old fluid out of your brake lines. Air is bad because it compresses. That makes the pedal soft and long. Fresh fluid restores bite and feel. It also raises the boiling point for hard stops and hot days.
You may need to bleed if the pedal is spongy, you replaced parts, or fluid looks dark. It is also smart to flush every two years. That keeps water out and protects parts like the ABS pump and calipers.
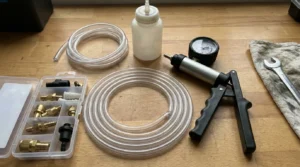
Tools and Materials You Will Need
To try how to use brake bleeder kit, gather these items first.
- Brake bleeder kit. Hand vacuum or pressure type.
- Fresh brake fluid. DOT 3, DOT 4, or DOT 5.1 only. Never mix DOT 5 silicone with others.
- Jack, stands, and wheel chocks.
- Clear catch bottle and hose if not included.
- Wrench for bleeder screws. Often 8–11 mm.
- Nitrile gloves and eye protection.
- Rags, paper towels, and fender covers.
- Brake cleaner spray.
- Anti-seize for bleeder threads. Use sparingly on outer threads only.
- Torque wrench for wheels and fittings.
- Scan tool if your ABS needs cycling.
Check your owner’s manual for the correct fluid type and service order. Using the wrong fluid can harm seals and the ABS unit.
Source: powerbuilt.com
Safety First
Before you try how to use brake bleeder kit, set up your space. Work on a flat floor. Use stands under the car. Do not trust a jack alone.
Brake fluid eats paint. Cover fenders. Wipe spills fast. Wear gloves and glasses. Keep fluid off pads and rotors. Dispose of old fluid at a recycle site. Do not pour it on the ground.
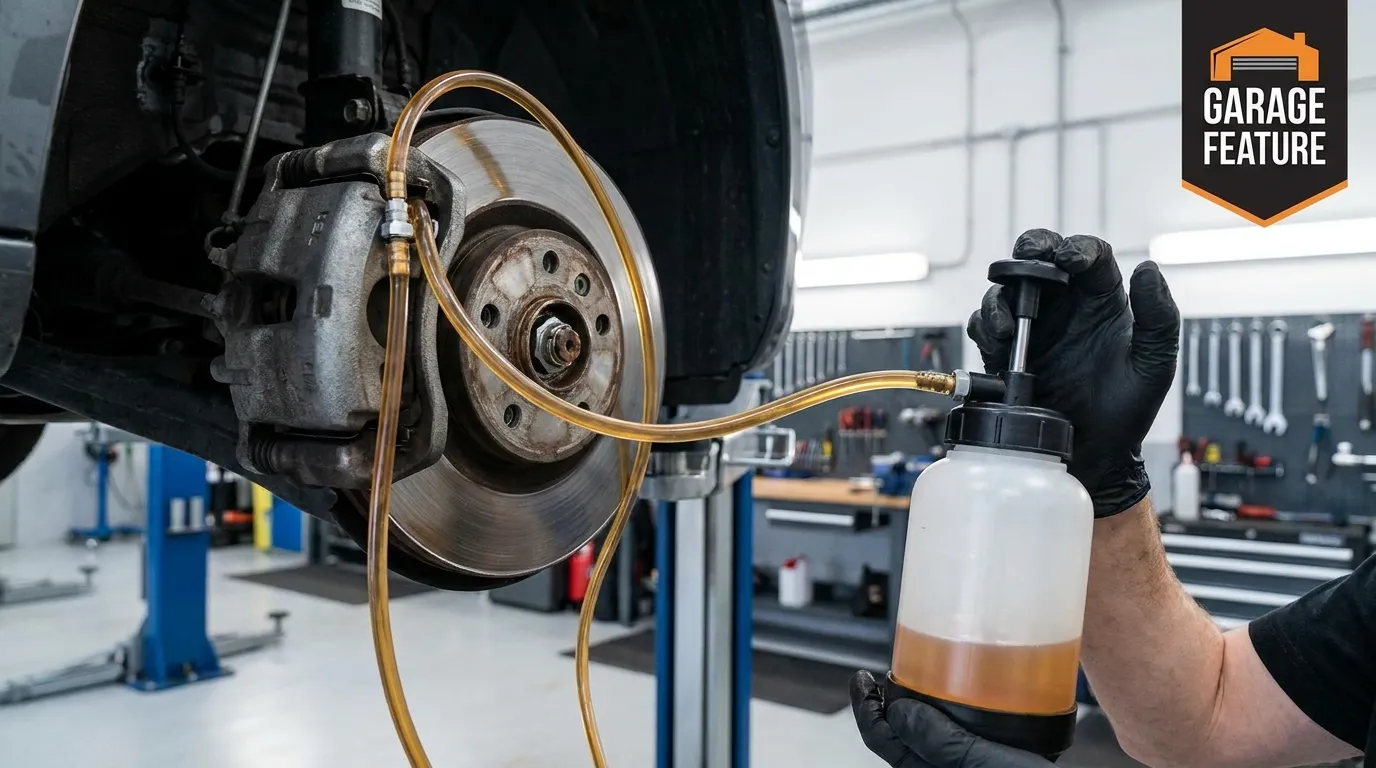
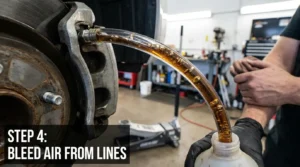
Step-by-Step: How to Use Brake Bleeder Kit (Hand Vacuum Type)
This is the most common DIY method. It works with one person and basic tools. Below is how to use brake bleeder kit with a hand vacuum pump.
- Prep the car
- Park flat. Chock wheels. Jack and place stands.
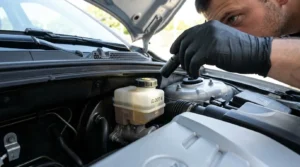
- Loosen the reservoir cap. Top it with fresh fluid to the MAX line.
- Plan the order
- Most cars: start farthest from the master cylinder, then move closer.
- Common order on left-hand drive: right rear, left rear, right front, left front.
- Always check your service manual, as some ABS systems use a different order.
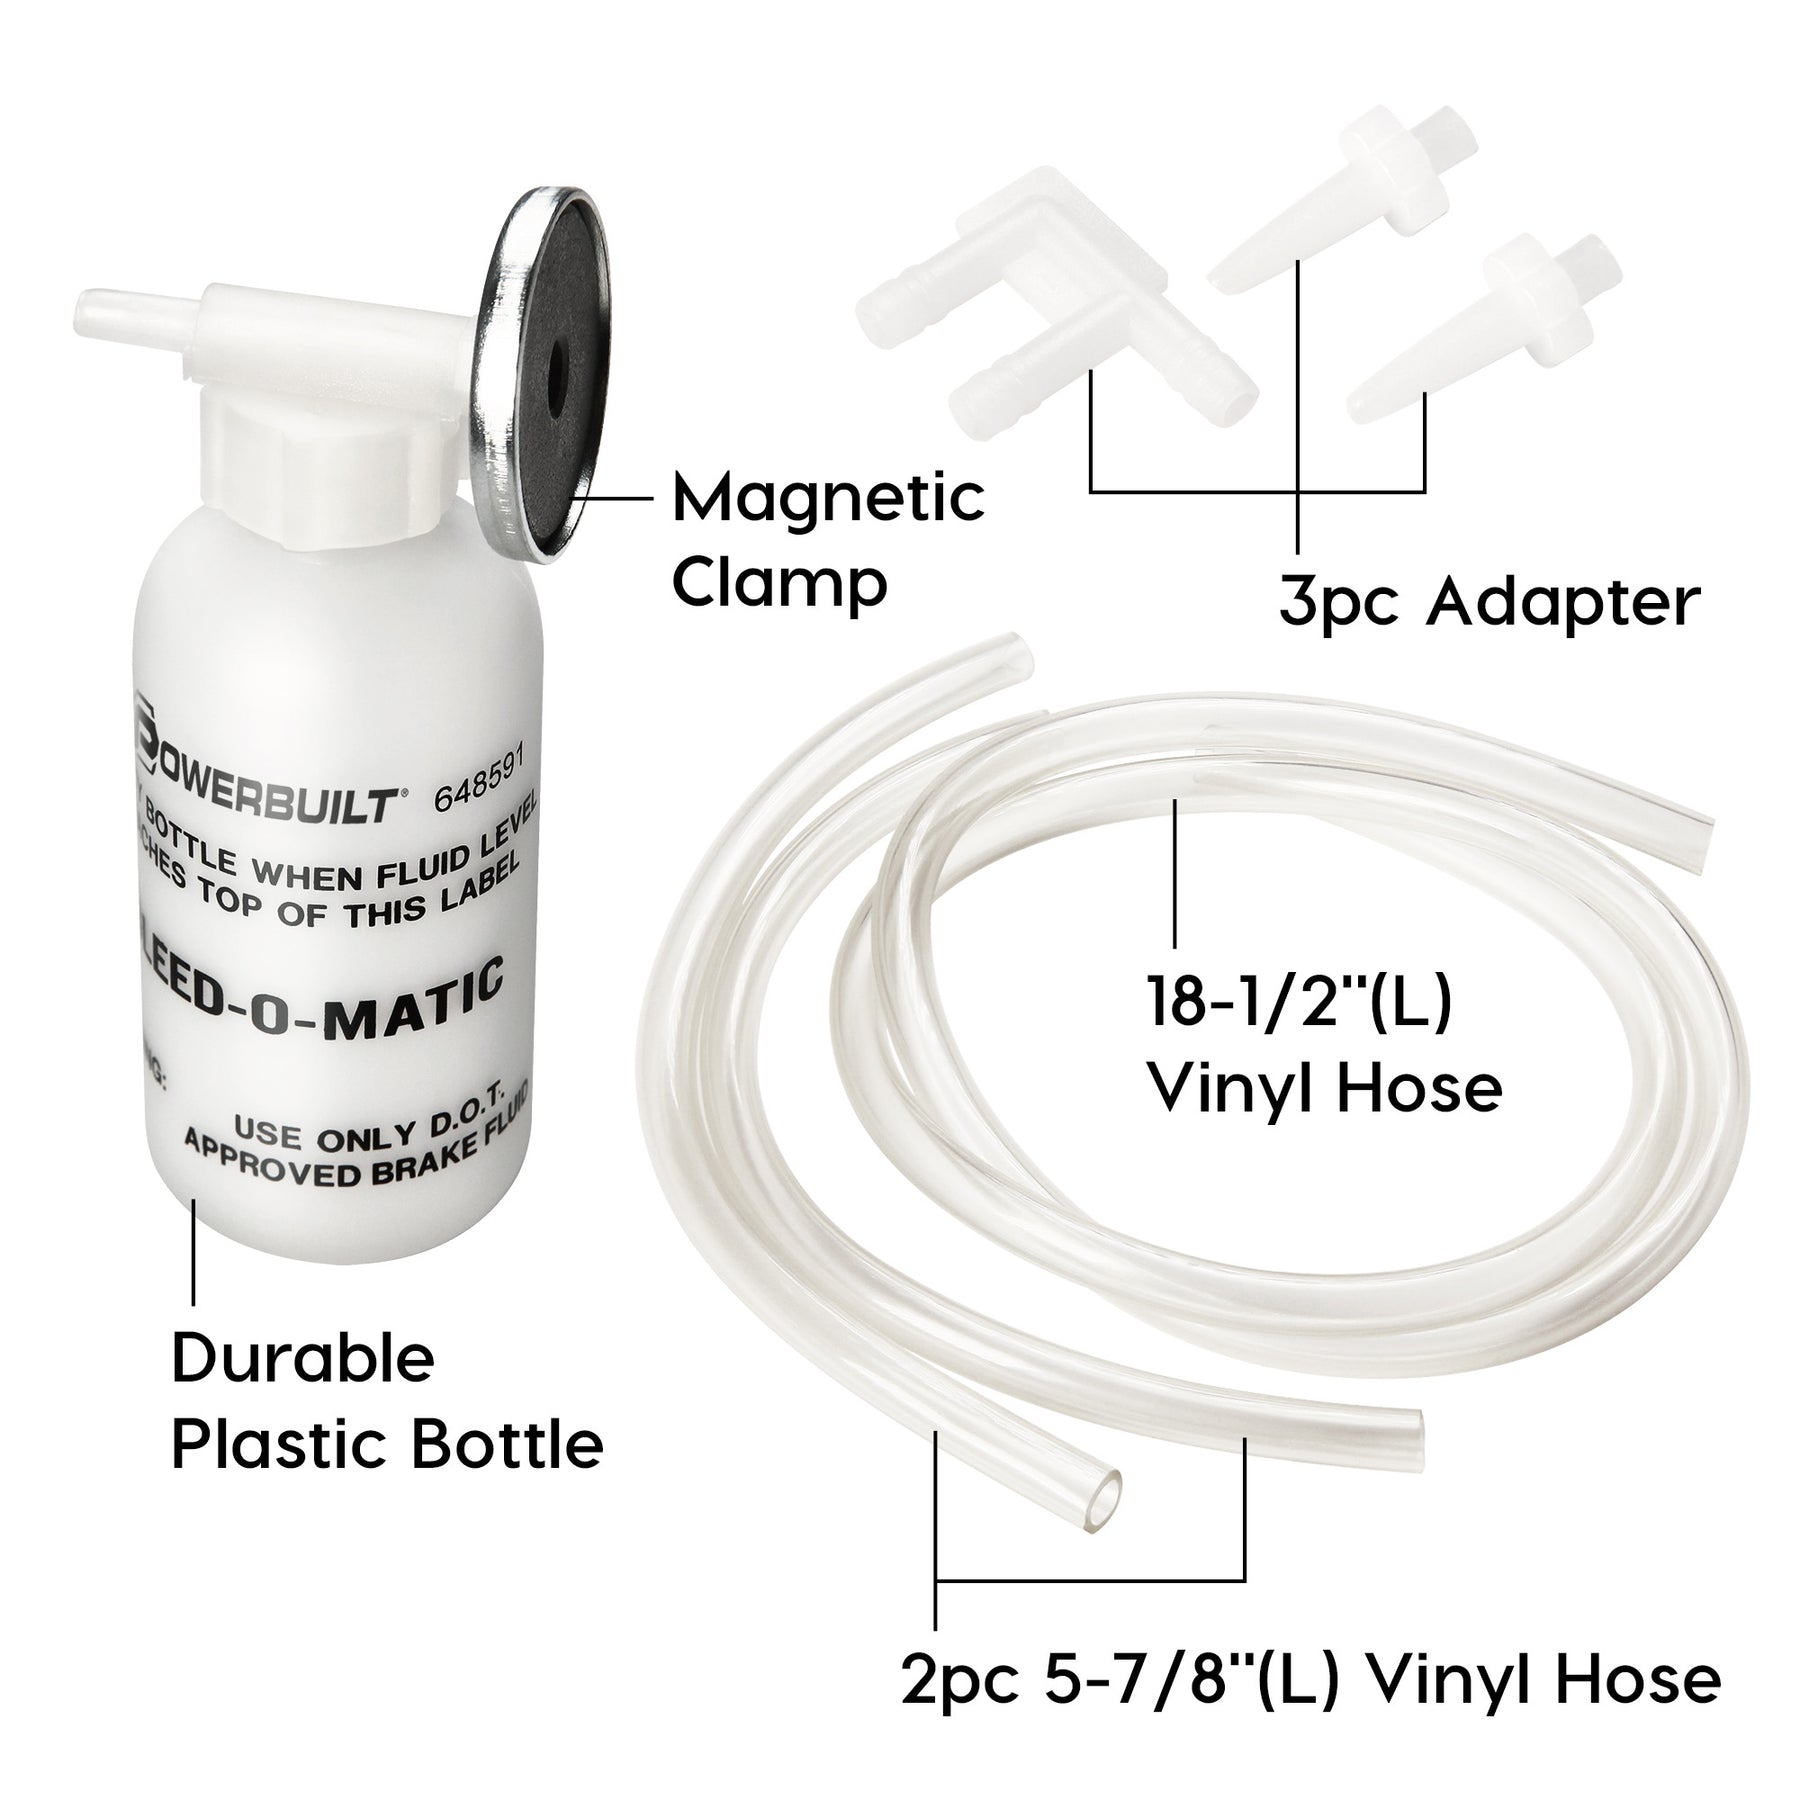
- Set up the kit
- Attach the clear hose to the bleeder on the first caliper.
- Put the other end on the vacuum bleeder. Place the catch bottle low and secure.
- Pull vacuum
- Crack the bleeder one quarter turn.
- Squeeze the vacuum pump to 15–20 inHg. Keep it steady.
- Watch fluid move and bubbles pass. Keep the hose tip under fluid in the bottle.
- Keep topping the reservoir
* Check the master cylinder often. Never let it run low. Add fluid as needed.- If it runs dry, you pull in air. Then you must start again.
- Close and move on
- When bubbles stop and fluid runs clear, close the bleeder snug. Do not over-tighten. Many bleeders seal well at about 6–10 ft-lb.
- Clean with brake cleaner. Move to the next wheel in order.
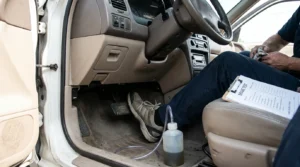
- Final checks
- Confirm the pedal is firm with the engine off.
- Top the reservoir. Reinstall the cap. Clean spills.
- Refit wheels. Torque lug nuts to spec. Road test at low speed first.
Many DIYers ask how to use brake bleeder kit without making a mess. Keep the bottle low, keep the hose under fluid, and take your time. I learned this on a 2008 Civic. Slow pulls gave me clear fluid fast and no foam. The pedal felt new.
Using a Pressure Bleeder
A pressure bleeder is fast and neat. It pushes fresh fluid from the master cylinder through the lines.
- Prep the bleeder
- Fill the canister with new fluid.
- Attach the cap adapter to the reservoir. Make sure it seals well.
- Pressurize
- Pump to 15–20 psi. Do not exceed the cap’s limit. Many caps state the max.
- Open bleeders in order
- Crack the first bleeder. Let fluid run until clear and bubble-free.
- Close and move to the next wheel. Keep pressure steady.
- Monitor level and pressure
- Watch the canister level. Refill if needed. Do not let air enter.
- Wrap up
- Release pressure. Remove the cap. Top off the reservoir.
- Clean all fittings. Test the pedal and road test.
Here is how to use brake bleeder kit with a pressure tool: keep pressure low, check seals, and never run the tank dry. On German cars, the correct cap adapter is key. A poor seal makes a big mess.
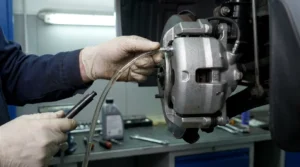
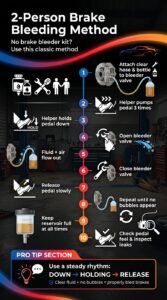
Two-Person Method When You Lack a Kit
You can bleed with a helper and a clear hose. It is slower, but it works well.
- Fit a hose and bottle to the first bleeder.
- The helper pumps the pedal three times, then holds.
- You crack the bleeder. Fluid and air flow out. The pedal sinks.
- You close the bleeder. The helper releases the pedal.
- Repeat until clear fluid, no bubbles. Keep the reservoir full.
- Move through the order. Check for leaks. Test the pedal.
If you cannot figure out how to use brake bleeder kit today, this classic method can save the job. Just follow a steady rhythm. Say “down, holding, release” out loud to sync.
Special Notes for ABS, Trucks, and Motorcycles
ABS can trap air in the pump and valves. Some cars need a scan tool to cycle the ABS during bleeding. Follow the repair manual steps. If your ABS light is on, fix that first.
On trucks with long lines, go slow. Use more fluid. Keep the pressure steady. On motorcycles, keep the bars straight and the master level. Tap the caliper and lines to free tiny bubbles. This also works on clutch hydraulics with the same method.
If your car has ABS, how to use brake bleeder kit may change. Read the service data, or you will chase a soft pedal for hours.
Troubleshooting and Common Mistakes
One common issue when learning how to use brake bleeder kit is foamy bubbles. Foam often means an air leak at the bleeder threads. Wrap the bleeder screw threads with a small ring of PTFE tape, but keep the tip bare. That keeps air out while still letting fluid pass.
Other tips and fixes:
- Soft pedal after bleeding
- Recheck the order. Bleed the master if it ran dry.
- Tap lines and calipers to dislodge trapped air.
- No fluid flow
- Bleeder may be clogged. Remove and clean carefully.
- The rubber hose may be too loose. Tighten the fit.
- Pedal good, then fades
- Look for leaks at hoses, calipers, or the master.
- Check rotor and pad contamination. Fix and re-bed pads.
- Caliper upside down
- The bleeder must be at the top. If it is low, air will not escape.
- Old rubber lines
- Swollen hoses can trap debris and feel bad. Replace if needed.

- Swollen hoses can trap debris and feel bad. Replace if needed.
Maintenance Tips and How Often to Bleed
Bleed or flush every two years for street cars. Track or mountain use may need every 3–6 months. Water lowers the boiling point. That leads to fade and a long pedal when hot.
Use DOT 3 or DOT 4 for most cars. DOT 5.1 is fine for high heat, and it mixes with 3 and 4. Do not use DOT 5 silicone unless your system is built for it. Look at fluid color. Dark or burnt smell means change it soon.
Track days change how to use brake bleeder kit because fluid boils sooner. I swap to high-temp DOT 4 before events, then bleed the fronts after each weekend. It keeps the pedal strong all day.
Cost, Time, and Kit Types Compared
Picking the right tool makes the job easy and clean.
- Hand vacuum bleeder
- Low cost. One-person job. May pull in air at threads. Slower.
- Pressure bleeder
- Mid cost. Fast and clean. Needs the right cap. Great for full flushes.
- Gravity bleed
- Very cheap. Very slow. Works best with new parts and open lines.
- Two-person method
- Free. Needs a helper. Easy to over-stroke old masters if not careful.
Plan 45–90 minutes for a full flush at home. Add time for stuck bleeders or rust. How to use brake bleeder kit well comes down to prep, clean tools, and patience.
Frequently Asked Questions of how to use brake bleeder kit
Do I need to bench bleed a new master cylinder?
Yes, if you installed a new or rebuilt master. Bench bleeding fills internal pockets so you avoid trapped air in the car.
What is the correct bleeding order?
Most cars start farthest from the master and move closer. Check your manual, since some ABS systems use a unique order.
How much pressure should I use with a pressure bleeder?
Keep it around 15–20 psi. Higher pressure risks leaks at caps and hoses and can aerate fluid.
Can I mix DOT 3, DOT 4, and DOT 5.1?
You can mix DOT 3, DOT 4, and DOT 5.1. Do not mix them with DOT 5 silicone fluid.
Why is my pedal still soft after bleeding?
You may still have air, or there is a leak. Recheck each corner, tap lines, and consider ABS cycling if your model needs it.
How do I dispose of old brake fluid?
Use a recycle center or auto parts store that accepts it. Do not pour it into drains or on the ground.
Can I bleed brakes alone?
Yes, with a vacuum or pressure bleeder. A one-way check valve hose can also help for solo work.
Conclusion
Bleeding brakes is simple when you follow a clear plan. You learned how to use brake bleeder kit with vacuum and pressure tools, the right order, and how to avoid common traps. With fresh fluid and no air, your car will stop shorter and feel safer.
Set up your tools, take it slow, and give your brakes the care they deserve today. Want more step-by-step guides like this? Subscribe, share your results, or drop a question in the comments so we can help you dial in a firm, confident pedal.