Chock wheels, use jack stands, and lift only at approved jack points.
If you want a safe, no-drama lift every time, this guide is for you. I’ll show you how to use hydraulic floor jack like a pro, from setup to shutdown. I’ve lifted everything from low-slung coupes to heavy SUVs, and I’ll share the steps, tips, and small fixes that make a big difference. Read on to learn how to use hydraulic floor jack with confidence and care.
Safety first: set up for a stable lift
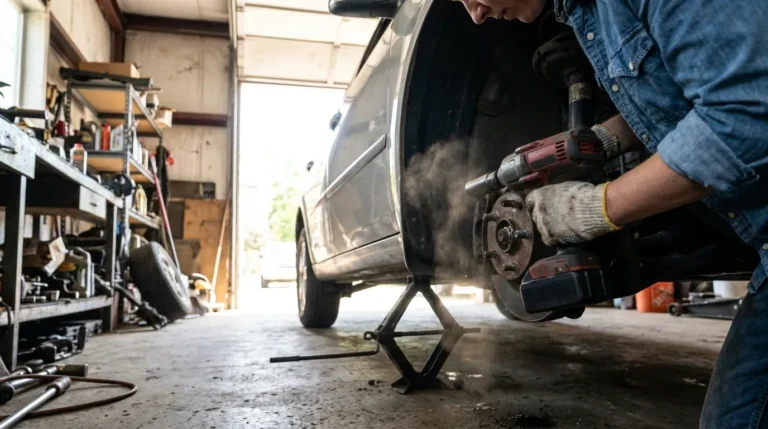
Safety is the heart of how to use hydraulic floor jack. A jack is for lifting, not holding. Always use jack stands on solid ground. Never crawl under a car supported by the jack alone.
Before you try how to use hydraulic floor jack, check the weight rating. Your jack should support at least 75% of your vehicle’s curb weight. The jack and stands must meet ASME/PASE standards and be in good shape.
Do these every time:
- Park on flat, solid concrete. Avoid slopes and soft ground.
- Engage the parking brake. Put the car in Park or in first gear.
- Chock the wheels that stay on the ground, front and back.
What not to do:
- Do not lift on plastic covers, exhaust parts, or a flimsy pinch weld.
- Do not rush the lift. Watch for tilts, shifts, or creaks.
- Do not exceed the jack’s rated capacity.
From my own shop time, I learned one hard rule early. If it feels wobbly, stop and reset. That saved me from a scary slide on a sloped driveway years ago. Mastering how to use hydraulic floor jack starts with calm, repeatable steps.

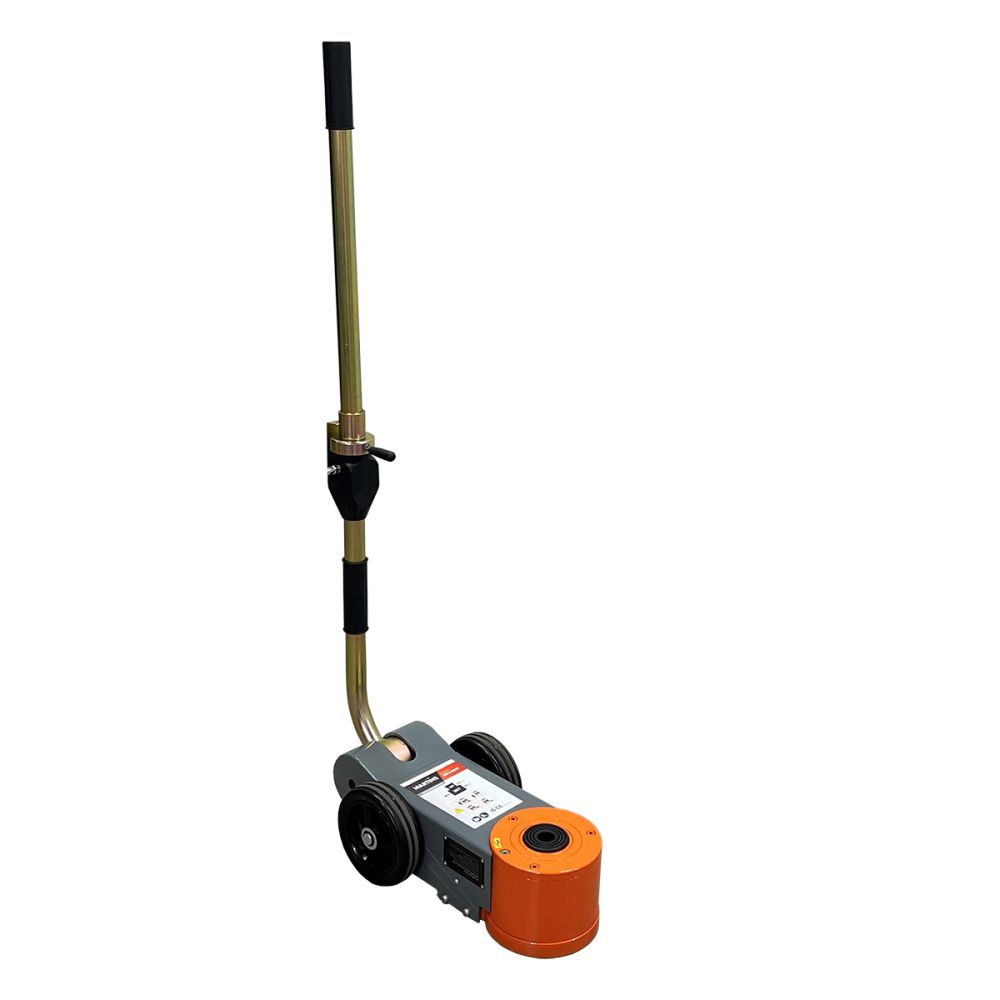
Tools and terms you should know
Before you learn how to use hydraulic floor jack, gather what you need. A simple kit makes the job fast and safe.
Essentials:
- Hydraulic floor jack with the right capacity and a low-enough profile
- Jack stands with matching or higher capacity
- Wheel chocks
- Rubber pad or pinch-weld block for the saddle
- Lug wrench or breaker bar if removing wheels
- Work gloves and a flashlight
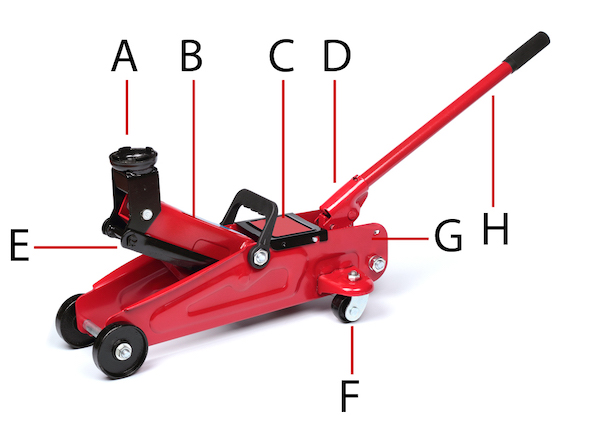
Key parts on the jack:
- Saddle is the round pad that touches the car.
- Handle pumps the jack to raise the saddle.
- Release valve lowers the saddle. It opens when you twist it slowly.
- Casters let the jack roll so the saddle can center under load.
Nice-to-haves:
- Torque wrench for wheel nuts
- Kneeling pad or creeper
- Service manual or owner’s manual for jack points
With the right gear, you can focus on how to use hydraulic floor jack the right way, not fighting tools that fail.
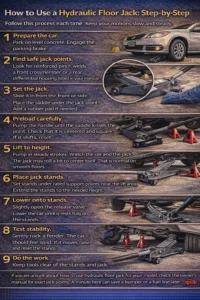
How to use hydraulic floor jack: step-by-step
Follow this process each time. Keep your motions slow and steady.
- Prepare the car. Park on level concrete. Engage the parking brake. Chock the opposite wheels.
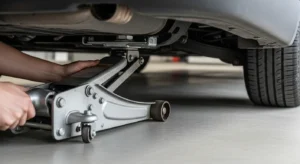
- Find safe jack points. Look for reinforced pinch welds, a front crossmember, or a rear differential housing listed in your manual.
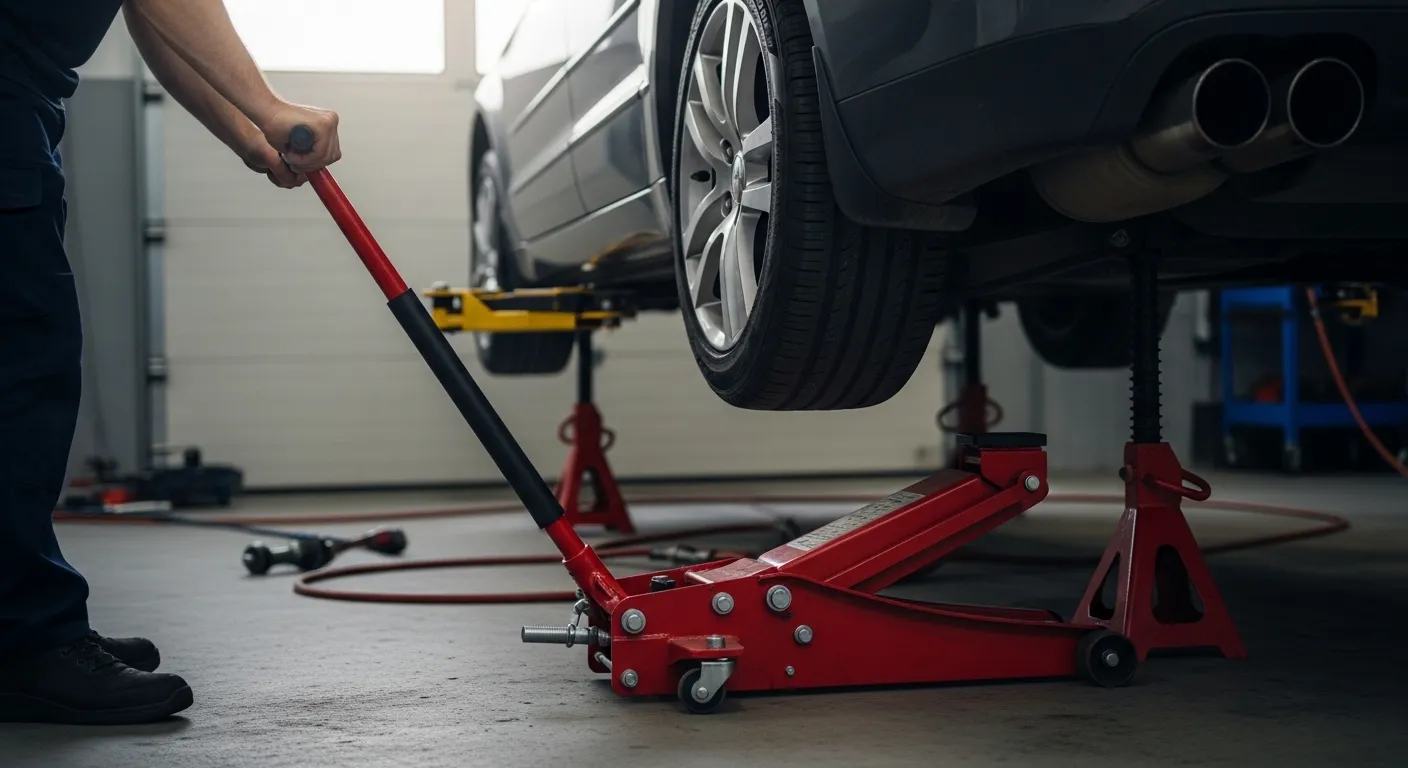
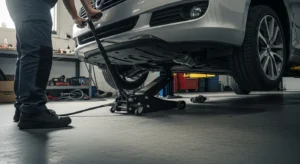
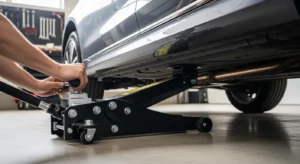
- Set the jack. Slide it in from the front or side. Place the saddle under the jack point. Add a rubber pad if needed.
- Preload carefully. Pump the handle until the saddle kisses the point. Check that it is centered and square. If it shifts, reset.
- Lift to height. Pump in steady strokes. Watch the car and the jack. The jack may roll a bit to center itself. That is normal on smooth floors.
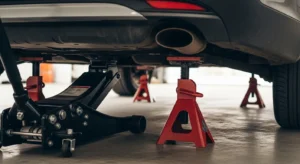
- Place jack stands. Set stands under rated support points near the lift area. Extend the stands to the needed height.
- Lower onto stands. Slightly open the release valve. Lower the car until it rests fully on the stands.
- Test stability. Gently rock a fender. The car should feel solid. If it moves, raise and reset the stands.
- Do the work. Keep tools clear of the stands and jack.
- Reverse to finish. Raise the car a little. Remove stands. Open the release valve slowly. Lower the car to the ground. Remove jack and chocks.
If you are unsure about how to use hydraulic floor jack for your model, check the owner’s manual for exact jack points. A minute here can save a bumper or a fuel line later.
Find the right jack points for your vehicle
Jack points change by body style. Use these common spots, but always confirm in your manual.
Sedans and hatchbacks:
- Pinch welds behind the front wheels and ahead of the rear wheels
- A reinforced front subframe crossmember
- A center rear point on the rear subframe or differential housing
SUVs and trucks:
- Frame rails at marked points
- Front or rear crossmembers that are flat and reinforced
- Solid axle differential (pumpkin) only if the manual allows it
Electric vehicles:
- Dedicated lift pads near the battery tray
- Use EV-safe rubber pucks to protect the underbody
Avoid thin metal, plastic trays, rocker covers, or exhaust parts. If you want long-term success with how to use hydraulic floor jack, learn your car’s map of strong spots. I keep a photo of each car’s points on my phone for quick checks.
Common mistakes to avoid
Stay clear of these pitfalls. They cause most mishaps I see in home garages.
- Lifting on weak spots. This bends metal and can pop seams.
- Skipping chocks. The car can roll as it lifts.
- Twisting the release valve too fast. The car can drop hard and shift.
- Using the jack as a stand. Jacks can lose pressure. Stands hold steady.
- Overreaching the jack. If the saddle is at max height, reset and use stands at a lower notch.
Make these part of your routine, and how to use hydraulic floor jack will feel smooth and safe.

Maintenance and storage for your floor jack
A well-kept jack lifts clean and holds firm. Set a simple care plan.
Routine checks:
- Wipe dirt from the saddle and wheels after use.
- Inspect for leaks, bent parts, and loose bolts.
- Test the release valve for smooth control.
Hydraulic care:
- Bleed air if the jack feels spongy. Open the release, remove the fill plug, pump the handle a few times, top off with proper jack oil, reinstall, and test.
- Use only hydraulic jack oil. Do not use brake fluid or motor oil.
Storage:
- Keep it clean and dry. Lower the saddle to reduce stress on seals.
- Do not store under a leaking vehicle.
Good upkeep makes every step of how to use hydraulic floor jack safer and easier.
Troubleshooting and quick fixes
When things feel off, try these quick checks.
Common issues:
- Jack will not lift. Low fluid or air in the system. Bleed and top off.
- Jack lifts, then sinks. Worn seals or stuck release valve. Service is needed.
- Handle is hard to pump. Cold oil or misaligned casters. Warm the jack and realign.
PAA-style quick answers:
Can I lift on gravel or asphalt?
Avoid soft ground. Use a thick steel plate or plywood on compacted soil, but concrete is best. Stability is the key for how to use hydraulic floor jack in real life.
What size jack do I need?
Most sedans are fine with a 2- or 3-ton jack. For SUVs and trucks, use 3-ton or higher with enough lift height for larger tires.
Why does my jack not reach my SUV?
Check maximum lift height. Use a jack with a higher range or add safe cribbing under stands. Never stack loose wood under the jack itself.
Is a bottle jack as good as a floor jack?
Bottle jacks lift high but need more clearance and can be less stable sideways. Floor jacks roll and self-center, which helps during how to use hydraulic floor jack steps.
Helpful accessories and safe alternatives
A few add-ons make each lift cleaner and protect parts.
Smart add-ons:
- Rubber saddle pads and pinch-weld pucks to prevent metal damage
- Low-profile floor jack for sports cars
- High-lift jack for trucks with big tires
- Jack stand pads to spread load on painted or aluminum parts
Alternatives:
- Scissor jack for emergencies only. It is slow and less stable.
- Ramps for oil changes when you do not need wheels off.
Choose gear that matches your vehicle’s weight and ground clearance. This keeps how to use hydraulic floor jack simple and repeatable.
Frequently Asked Questions of how to use hydraulic floor jack
Where do I place the jack on my car?
Use factory jack points shown in your owner’s manual. Typical locations are the pinch welds and reinforced subframe spots.
Can I go under the car with only the jack?
No. A jack can lose pressure without warning. Always support the car with rated jack stands on solid ground.
How fast should I lower the car?
Turn the release valve a tiny amount and watch the descent. Slow control prevents shifts and protects the stands.
Do I need wheel chocks if the parking brake is on?
Yes. Chocks stop rolling in both directions. They add a critical backup to the brake.
What fluid goes in a hydraulic floor jack?
Use dedicated hydraulic jack oil. Do not use brake fluid or engine oil, as they can damage seals.
How often should I service my jack?
Check it before each use. Full service or seal replacement depends on use, storage, and any signs of leaks or sinking.
Can I lift by the differential?
Many rear-wheel-drive cars and trucks allow this, but only if the manual approves it. If unsure, use frame or subframe points instead.
Conclusion
You now know how to use hydraulic floor jack with safe, repeatable steps. Set the scene, hit the right jack points, lift slow, and support with stands. Keep your jack in shape and it will serve you for years.
Put this guide to work on your next tire rotation or brake job. Start small and build a steady routine. Want more how-to tips and gear checks? Subscribe, ask a question, or share your own lift setup in the comments.